Taxes included.
Supplies for making crafts
Digital download
Digital file type(s): 3 PDF
Please note - The supply list has now been converted to Metric! (for all hardware, like screws, nuts...etc)
This plan is available in English Language only.
I've included a Tool list, just scroll down towards the bottom of the page.
This product now contains two plans with one purchase and it includes a "Modification Guide".
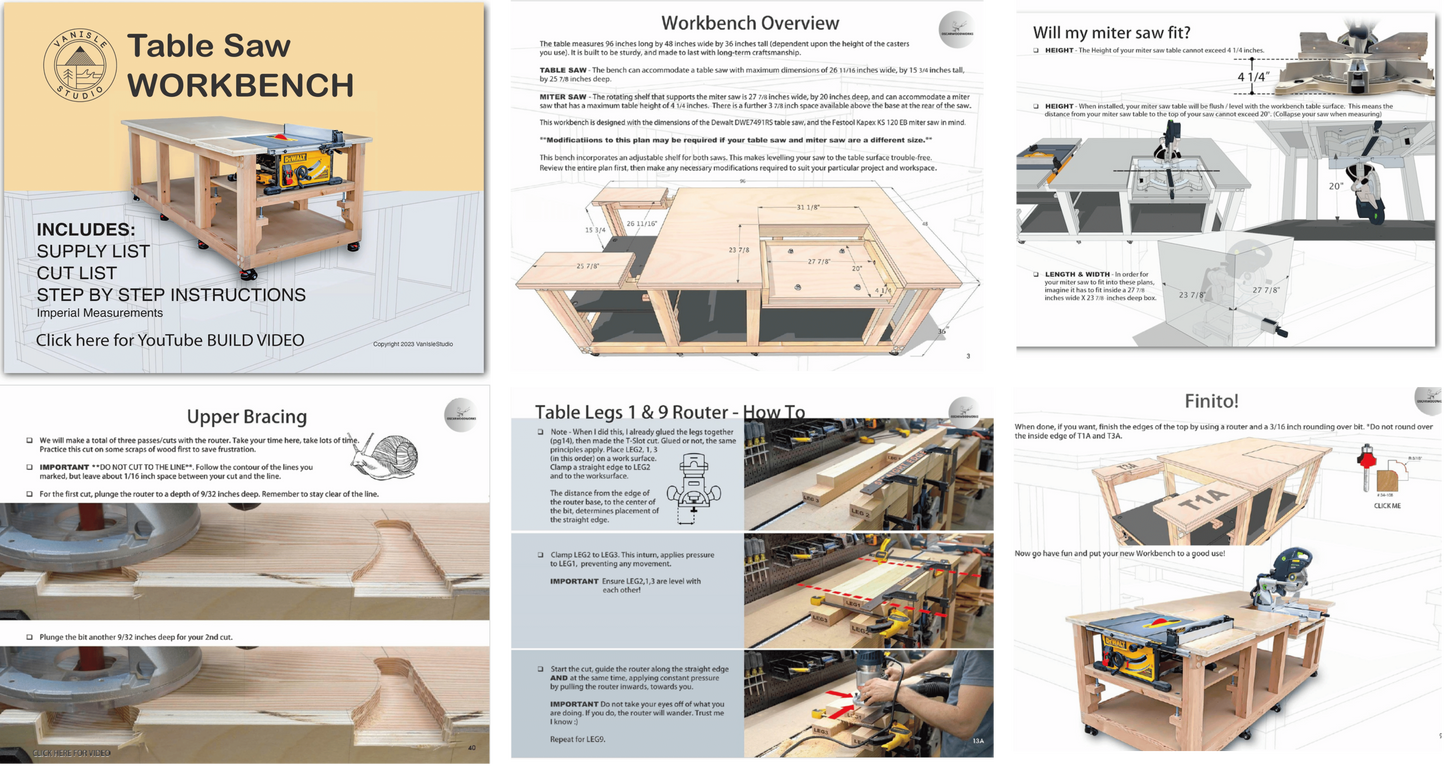
What's included:
One plan that utilizes 2X4's measuring 38mm X 89mm.
One plan that utilizes 2X4's measuring 45mm X 90mm.
One Modification Guide. There are many different manufactures, models and sizes of woodworking equipment.
The purpose of this guide is to assist you with modifications to the Table Saw + Miter Saw
Workbench plan, to suit your particular size table saw and miter saw.
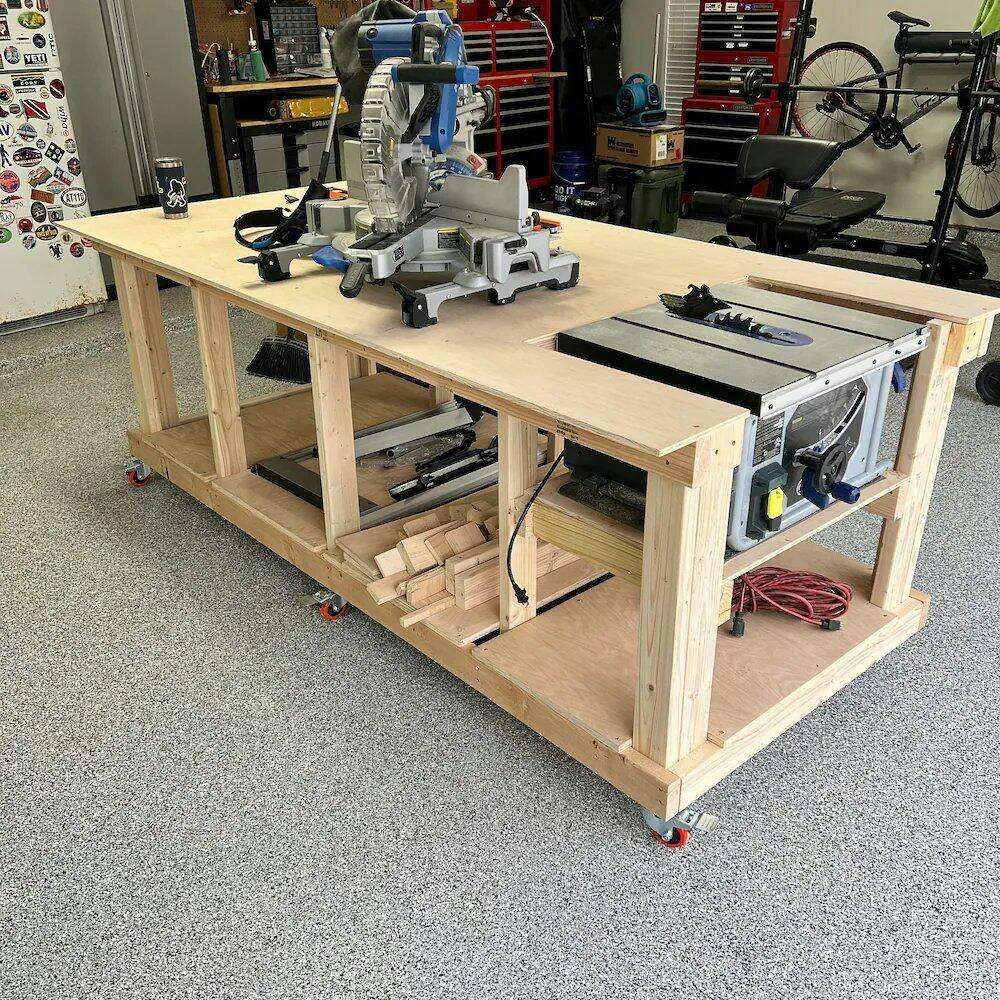
DIY woodworking plan to build a Table Saw + Miter Saw Workbench. These plans are saved in PDF format and will open on any media device. They are easy to follow with step by step instructions that can be printed on 8.5 X 11 paper. The plans come with a cut list, as well as a supply list so you know exactly what is required to build the workbench. I've included links to all of the supplies required, some of which are from Amazon products. (Some links are from American retailers, use them as a reference of what is required). As an Amazon Associate I earn from qualifying purchases at no cost to you.
The table measures:
2400mm long.
1200 inches wide.
896mm high (depending upon the height of the casters you use).
It is made to accommodate a table saw that has maximum dimensions of:
678mm wide.
400mm tall.
657mm deep.
It is made to accommodate a miter saw that has maximum dimensions of:
708mm wide.
108mm tall (from bottom of the base, to the saw's table surface).
509mm deep.(There is an additional 98mm of space above the feet, at the rear of the saw).
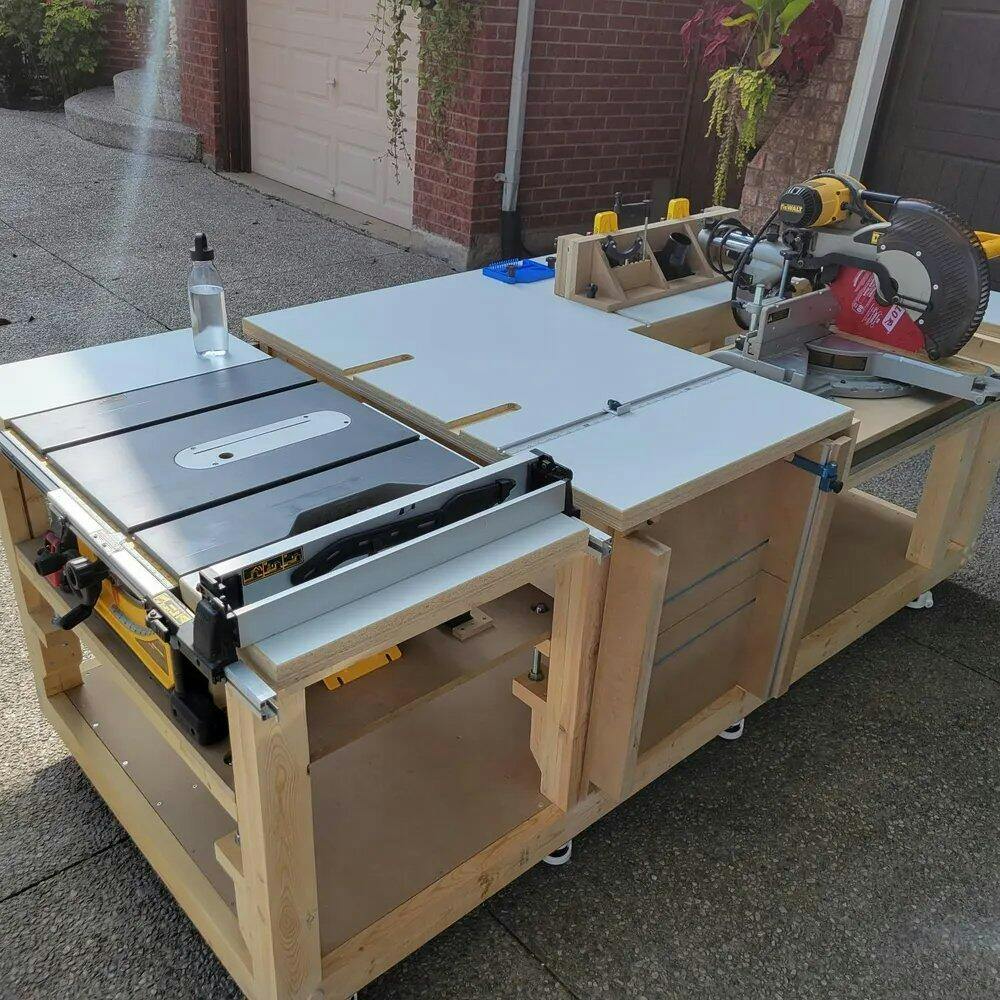
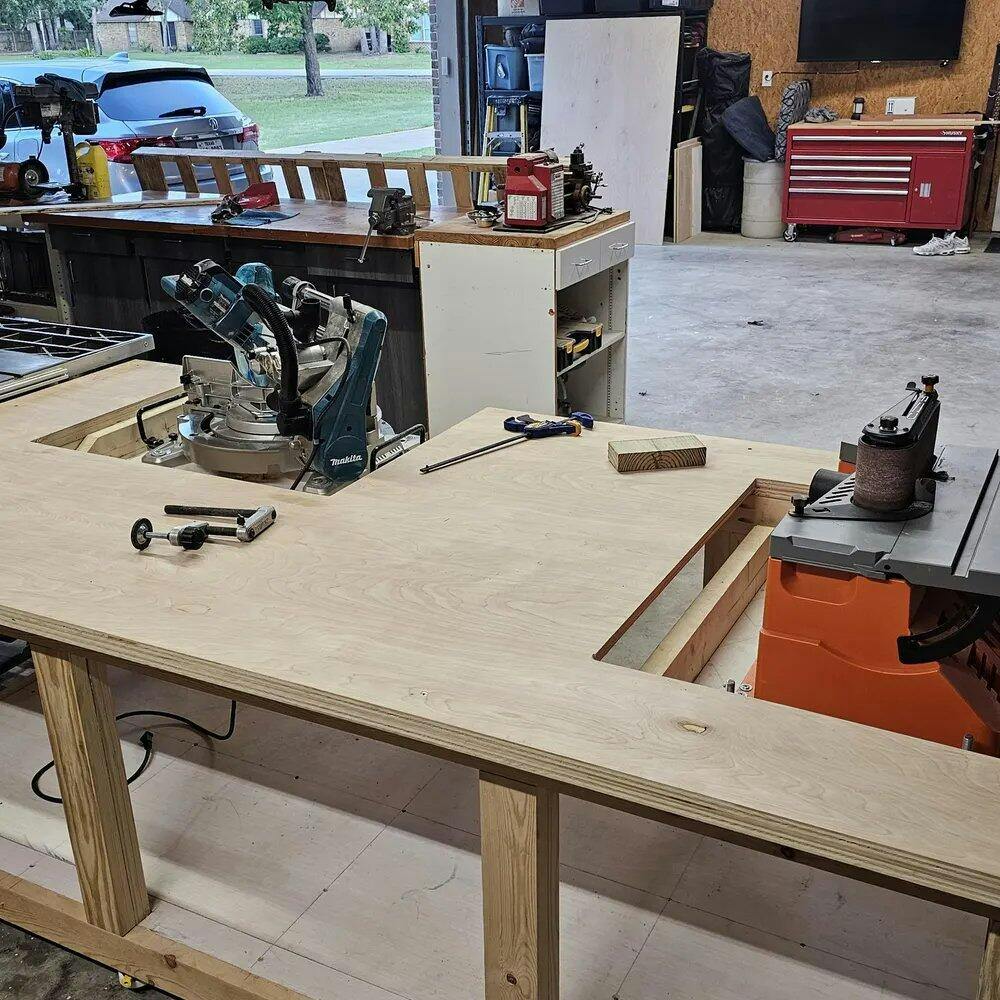
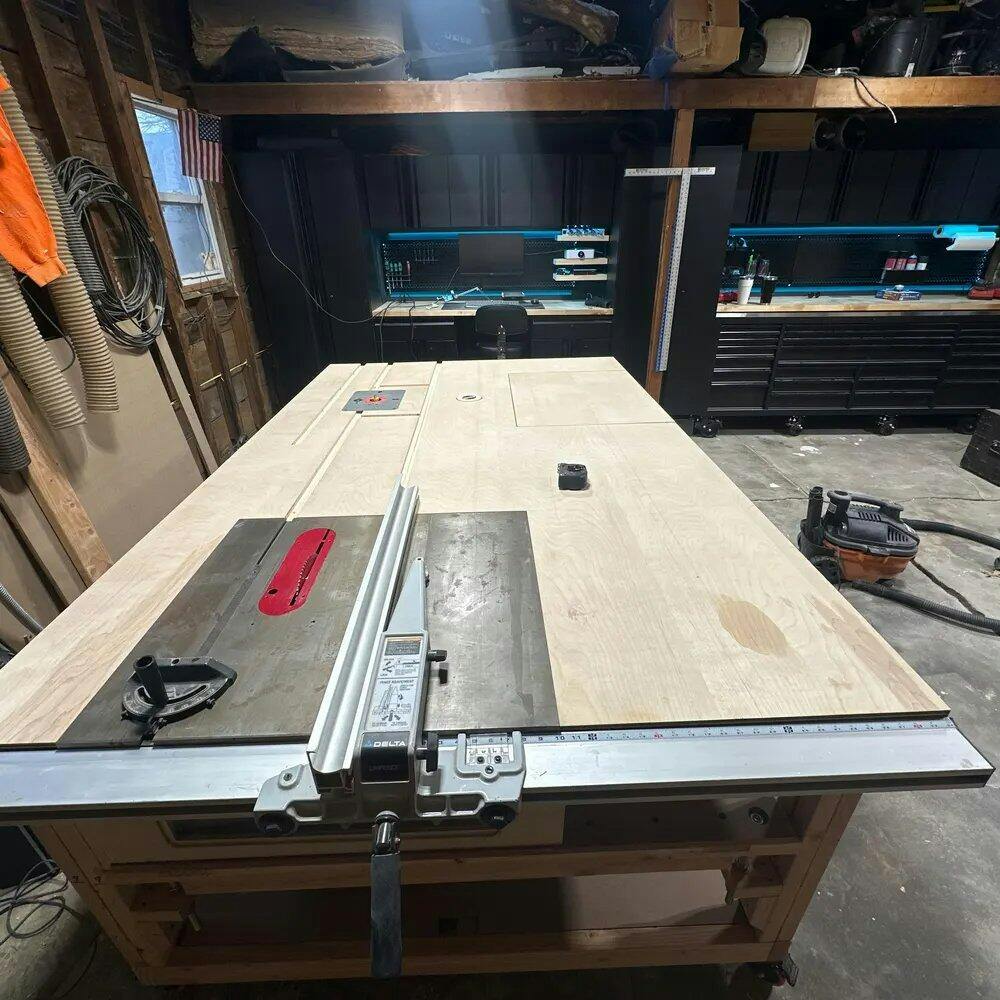
Features:
- The bench incorporates an adjustable shelf for both the table saw and the miter saw. This makes levelling the saw to the table surface trouble-free.
- The Miter Saw shelf rotates 180 degrees out of the way when not in use, leaving a smooth and unobstructed work surface.
- The bench acts as an out-feed table.
- There is plenty of room for storage on the bottom shelf for wood, tools, whatever you can think of.
- It is mobile, so it easily moves around your shop or garage when you need the extra space.
- The surface is constructed with two full sheets of plywood that will last for years. If you are really hard on the bench, you can replace the top layer of plywood, making the bench new again.
- It is built to be sturdy, and made to last with long-term craftsmanship.
Want to check out what your workbench can look like? Visit my Instagram for customer pictures 📸
https://www.instagram.com/oscar_wood_craft
Table Saw
Miter Saw
Router
Circular Saw
Jig Saw or small hand saw
Drill
A few things regarding:
Circular Saw – For more precise cuts, use a guide to direct your circular saw. A guide can be anything straight, such as a level or a piece of wood. Simply clamp it to your workpiece and slide the saw along the edge for a clean, straight cut! NOTE - A plunge cut saw and guide would make one cut in this plan easy. It's the cut that is at 30 degrees (pg 60 in the plan), However, a lot of people do not have a plunge cut saw, instead, a simple 30 degrees Chamfer router Bit and your router will also do a great job, and I’ve detailed this process in the plan.
Hand drill - The rotating miter saw shelf requires two precisely drilled holes for mounting. If you have a drill press, great! If not, a hand drill will work just fine. The key is to keep the drill as close to 90 degrees as possible. A simple trick is to ask a friend to observe your drilling angle from a different perspective – an extra set of eyes makes a big difference. Drill guides or Drill Mates are also readily available and surprisingly affordable. They're a worthwhile investment for any DIYer and will help you achieve perfect 90-degree holes every time.
One last thing to think about - I'd say the most important thing about this entire plan, is to try your best making the simple cuts. especially when cutting the legs at 90-degree angles and square corners. If your cuts are off, it can make subsequent steps more challenging — but don't worry, nothing that a few shims here and there cannot fix. Starting with straight, accurate cuts will make the build go smoothly. If you don’t already own one, I highly recommend getting an engineer’s square. It’s a simple, inexpensive tool that will ensure your cuts are spot-on and square. Over time, you’ll find it’s one of the most frequently used tools in your shop.